

Size Guide User Guide
A size chart on the product page, with a cm / inch toggle — assigned per product, per category or per attribute set, and readable with JavaScript switched off.
What the Size Guide module does
Size Guide puts a size chart on the product page, with a cm / inch toggle, so a shopper can check their measurements without leaving the page they are about to buy from. Wrong-size ordering is the single biggest driver of apparel returns, and a chart the customer can actually find is the cheapest way to reduce it.
A guide is a table you define — your own columns and rows — assigned to the products it applies to. One guide can serve a whole range: assign it to a product, and on Pro to a whole category or an entire attribute set, so new products inherit the right chart without anyone remembering to attach it.
It is freemium. The Free tier is the working feature: up to two guides, assigned per product, shown as an expandable panel or a product tab, with the unit toggle. Pro ($149, per website) lifts the guide limit and adds category and attribute-set assignment, per-store visibility, ready-made size standards, and the placement widget.
<details> element, not a scripted modal. It opens,
it is keyboard accessible and it is announced to screen readers without any JavaScript at all. The unit
toggle is the one enhancement layered on top — and with no JavaScript present, every column
renders, so a shopper sees more information rather than less.Getting started
Enable the module
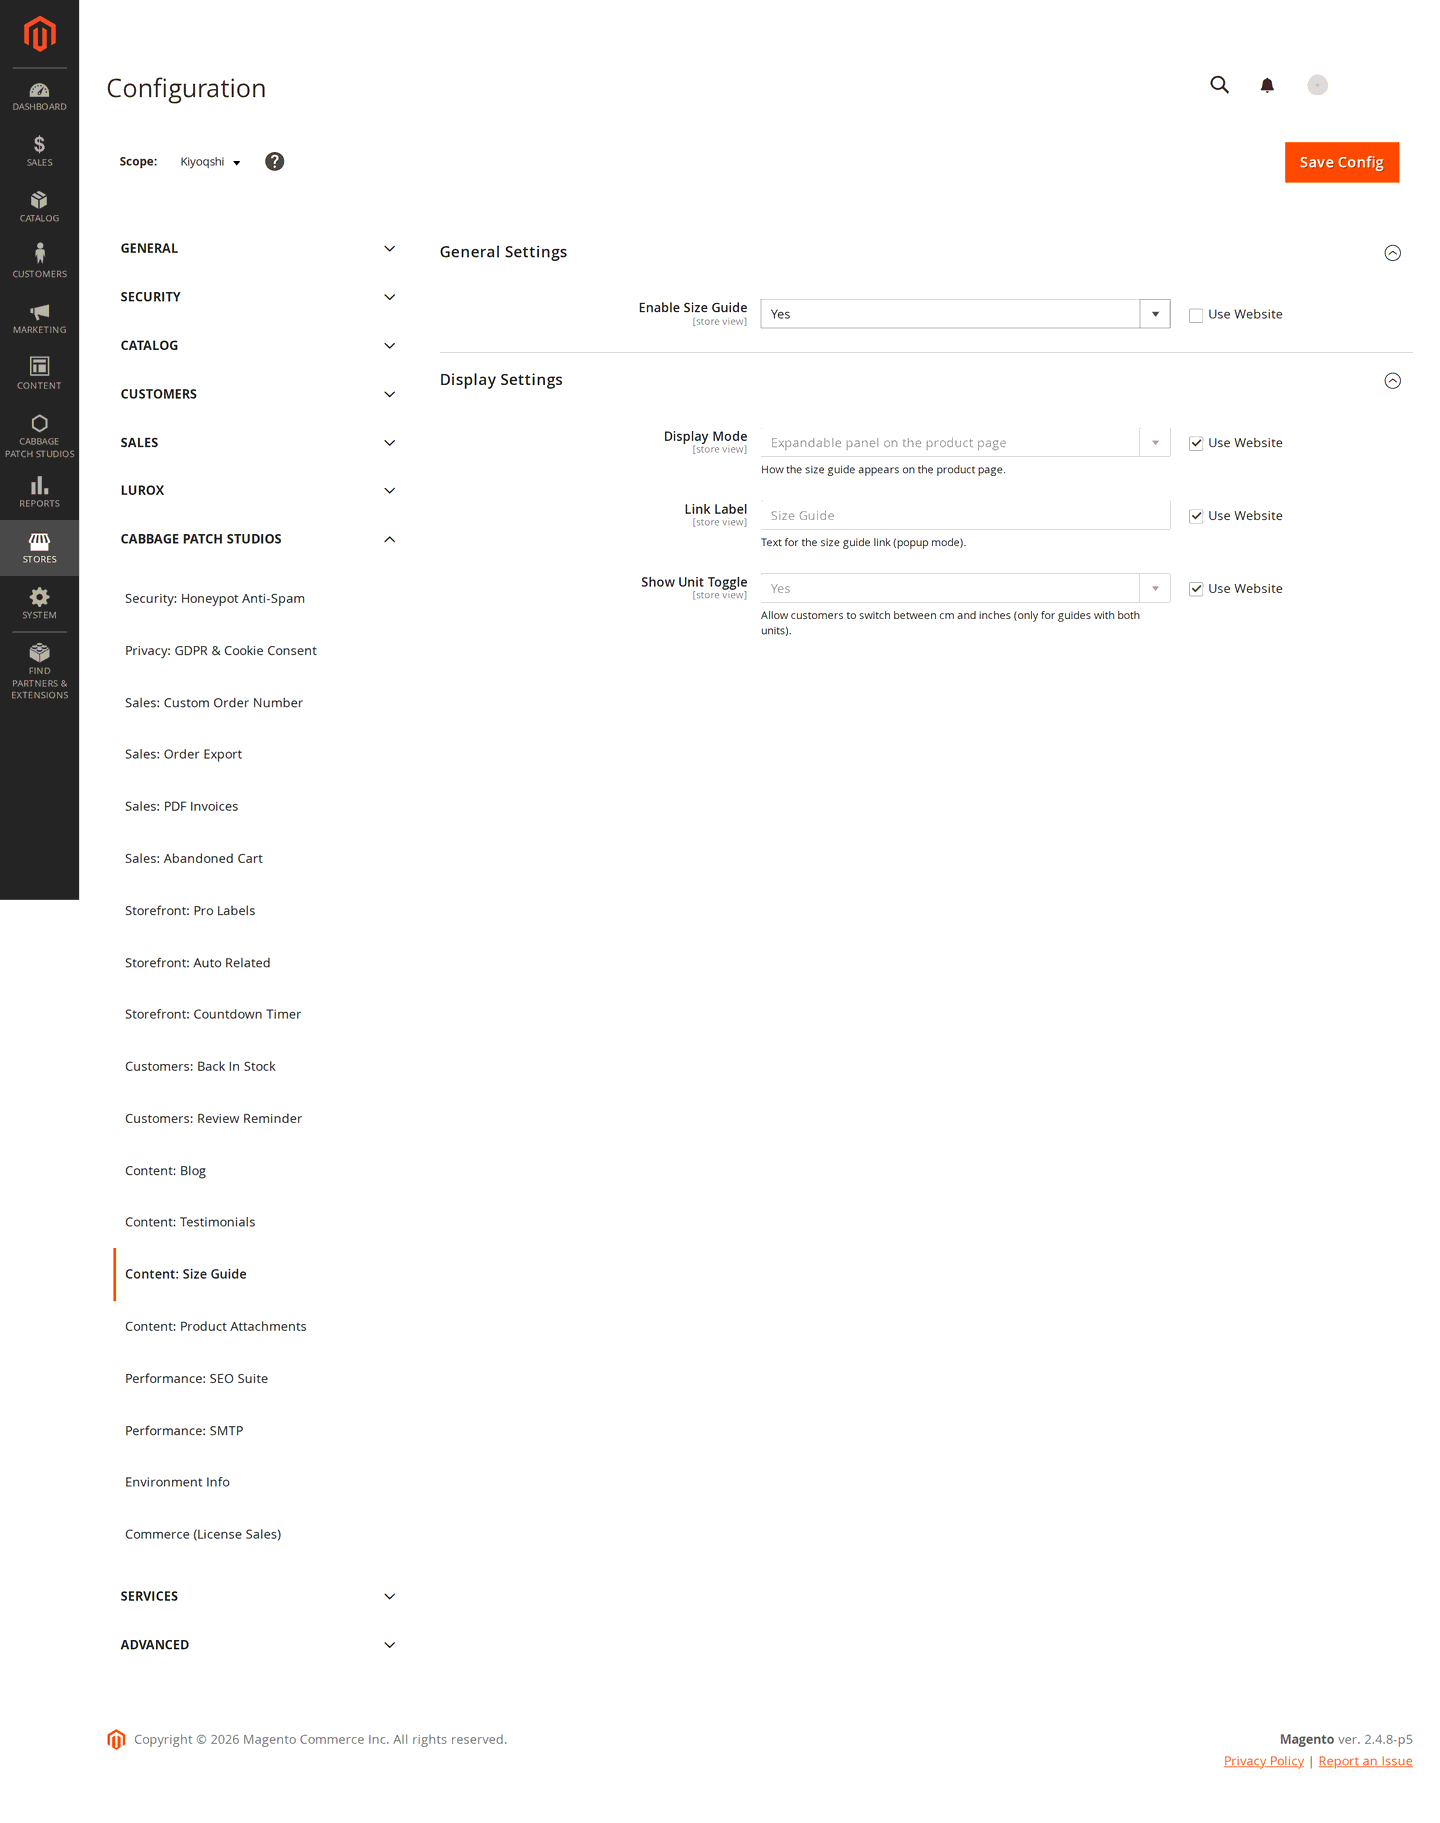
Go to Stores → Configuration → Cabbage Patch Studios → Content: Size Guide and set Enable Size Guide to Yes. It ships switched off on purpose — installing an extension should never change what your storefront does until you decide it should.
Once enabled, the Display Settings group appears:
- Display Mode — Expandable panel on the product page or Product tab.
- Link Label — the text of the link that opens the panel (panel mode).
- Tab Label — the tab caption (tab mode).
- Show Unit Toggle — whether shoppers can switch between cm and inches. This only has an effect on guides that actually carry both units.
Where it lives in the admin
Guides are managed at Content → Size Guides in the Cabbage Patch Studios menu.
Entering your licence key
Both tiers come with a key. Your Free key arrives with the $0 download — emailed to you and listed under My Licenses in your account, exactly like a paid one. Enter either key at Stores → Configuration → Cabbage Patch Studios → Licensing → CPS Size Guide License, then click Revalidate.
A key activates on one domain. Entering the same key on a second website is refused, which is what keeps a per-website licence meaningful.
Building a size guide
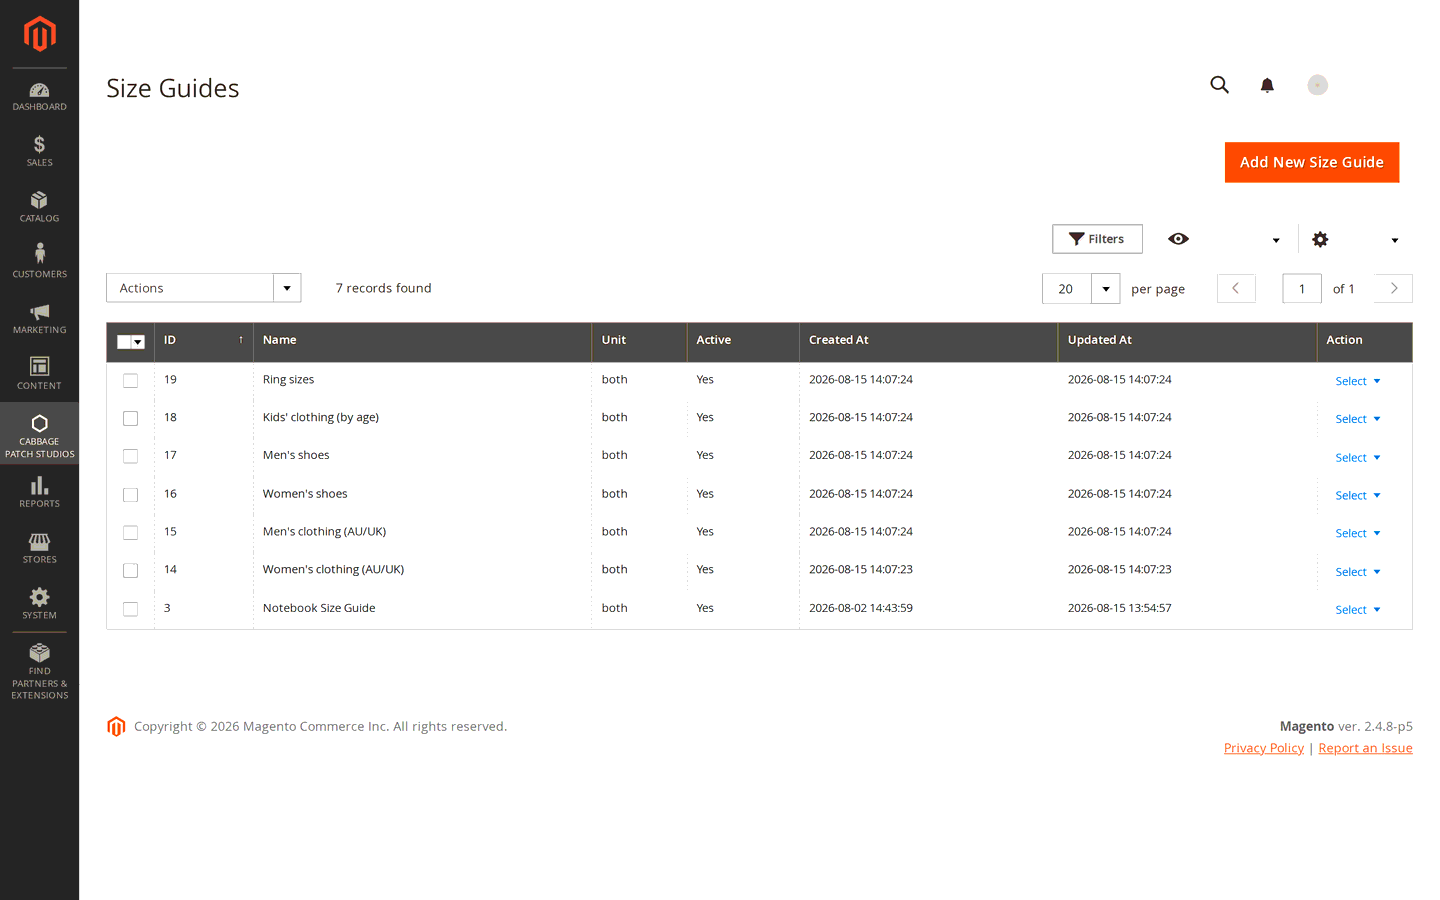
Go to Content → Size Guides and click Add New Size Guide.
Name, description and units
- Name — shown above the chart on the storefront, so write it for shoppers ("Women's clothing", not "WC-AU-v2").
- Description — optional text under the name. This is the right place for the sentence that prevents most wrong-size orders: whether the numbers are body measurements or garment measurements, and what to do if someone is between sizes.
- Unit System — cm, inches, or Both. The unit toggle only appears for guides set to Both.
- Active — an inactive guide stays in the list but renders nowhere.
The size chart table
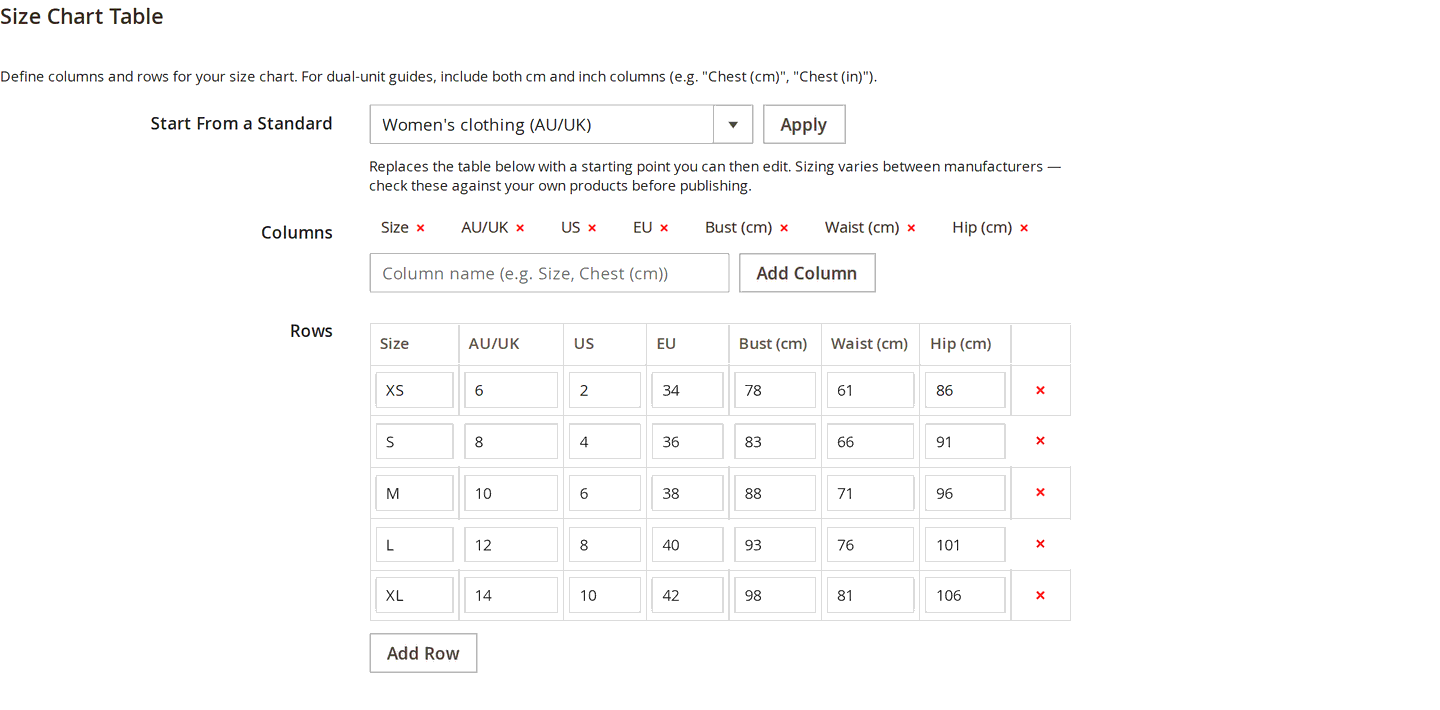
Add the columns you need, then add rows and fill in the cells. Columns and rows can be removed with the small × control.
Starting from a ready-made standard (Pro)
Start From a Standard offers a set of prepared charts — women's and men's clothing, women's and men's shoes, kids' clothing by age, and ring sizes. Choose one and click Apply and the table is filled in for you, ready to edit.
Treat a standard as a starting point. Sizing varies between manufacturers, and the numbers that matter are the ones measured off the garments you actually sell. Check a prepared chart against your own products before you publish it.
Assigning a guide to products
A guide only appears on the storefront once something is assigned to it. The Assignments section takes comma-separated IDs.
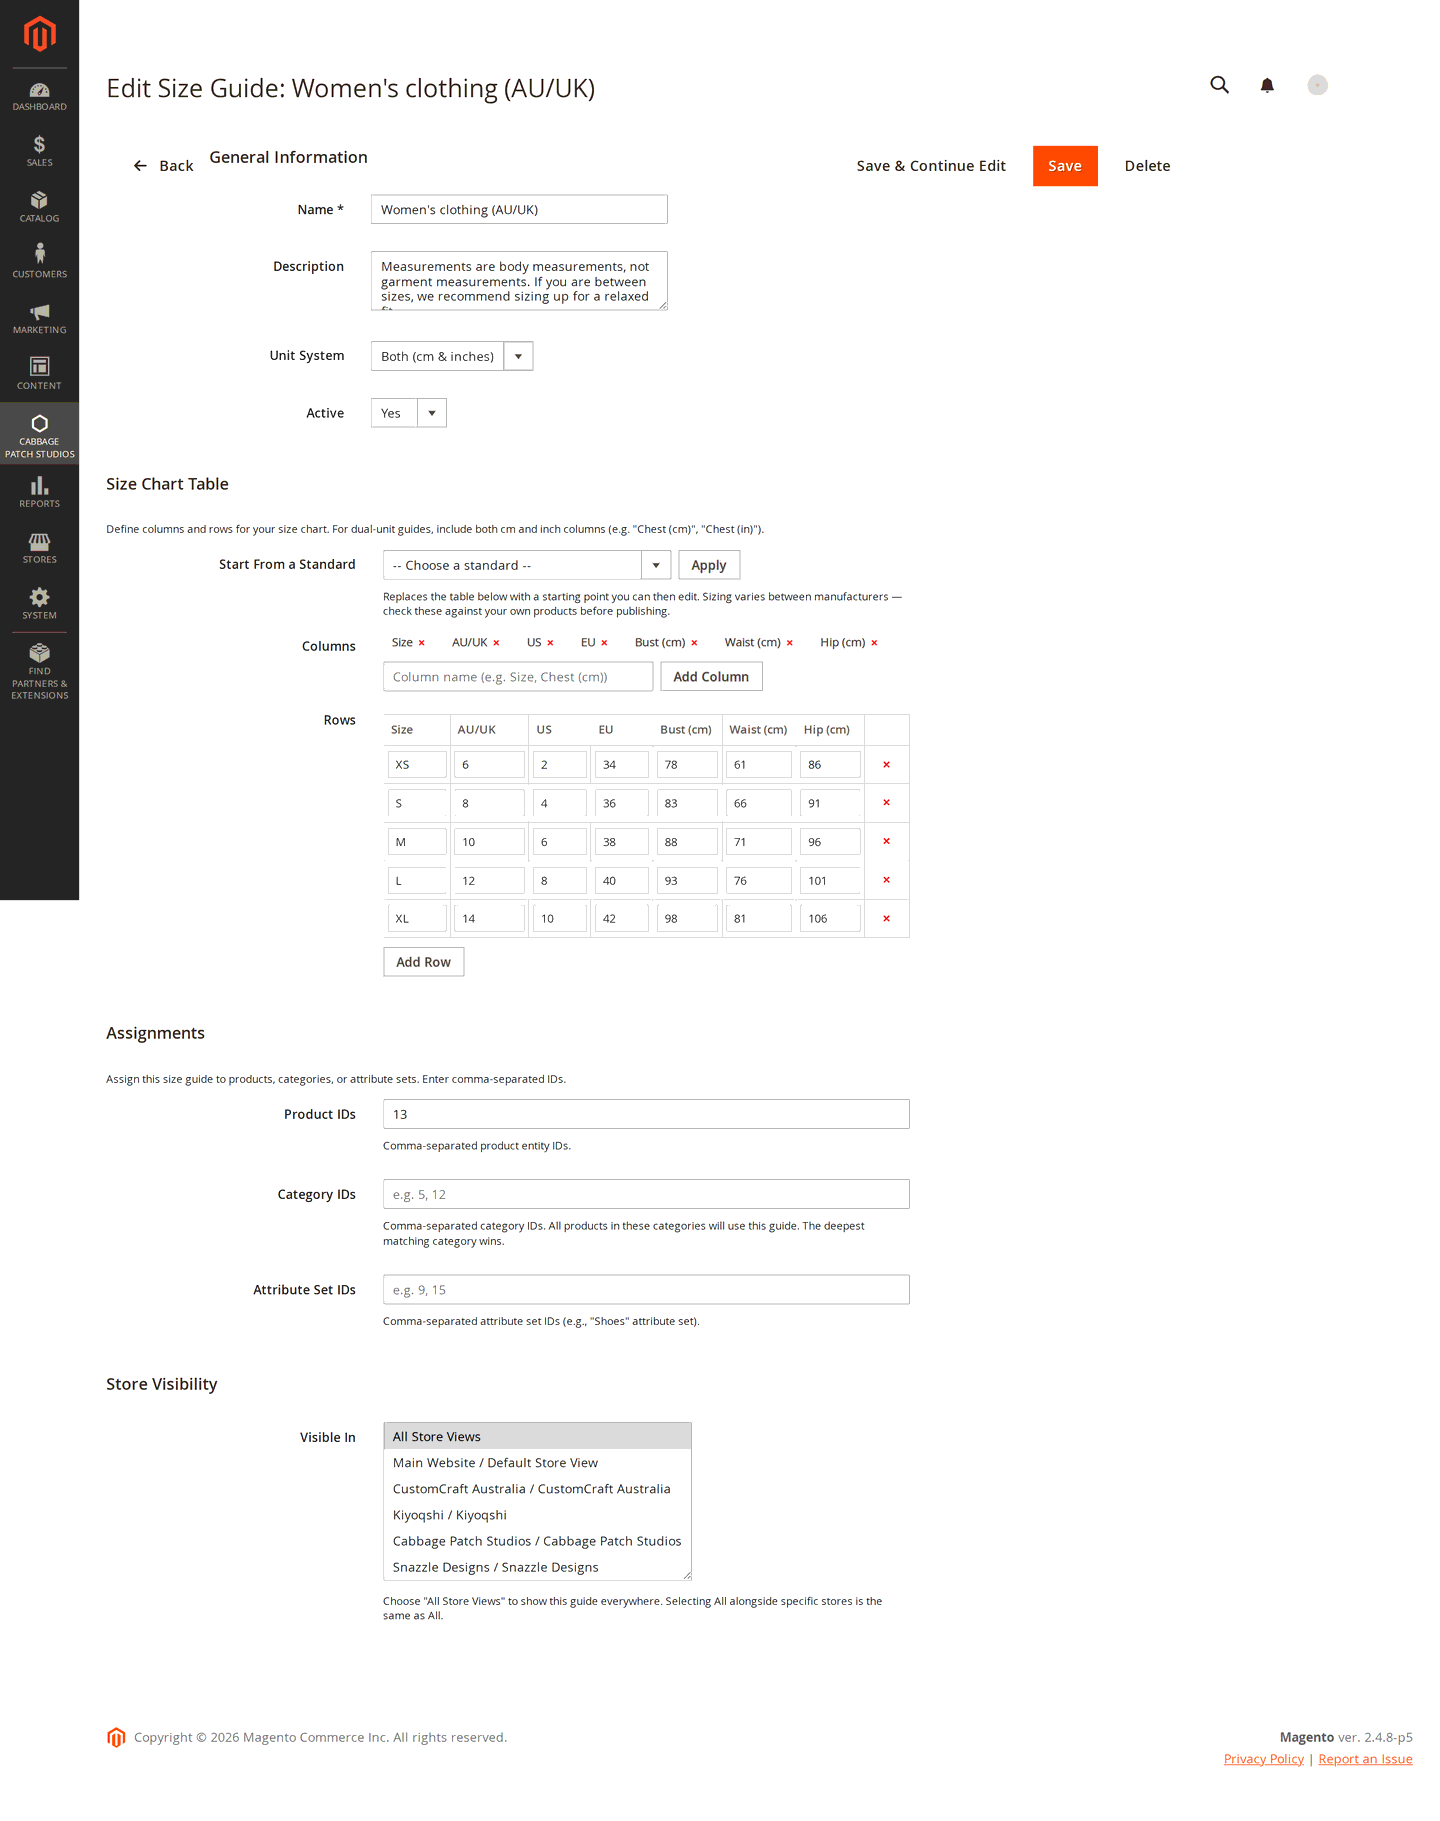
- Product IDs — available on every tier.
- Category IDs (Pro) — every product in those categories uses the guide.
- Attribute Set IDs (Pro) — every product built on that attribute set uses the guide, which is usually the least work of the three: put "Shoes" on the shoes attribute set once and every shoe you ever add is covered.
Which guide wins
When more than one guide could apply, the module resolves in this order:
- Product assignment — the most specific, so it always wins.
- Category assignment — and where a product sits in several guide-bearing categories, the deepest one wins. "Womens > Dresses" beats "Womens", which is what you would expect.
- Attribute set assignment — the broad fallback.
The first active, store-visible match is used. A product can only be directly assigned to one guide, so there is never an ambiguous answer.
Store visibility (Pro)
Visible In controls which store views a guide renders on. Choose All Store Views to show it everywhere, or pick specific stores — useful when one storefront sells in AU sizing and another in EU. Selecting All alongside specific stores is the same as All.
What the customer sees
In panel mode the guide appears as a labelled disclosure in the product information area. The shopper clicks it, the chart opens in place, and nothing navigates away.
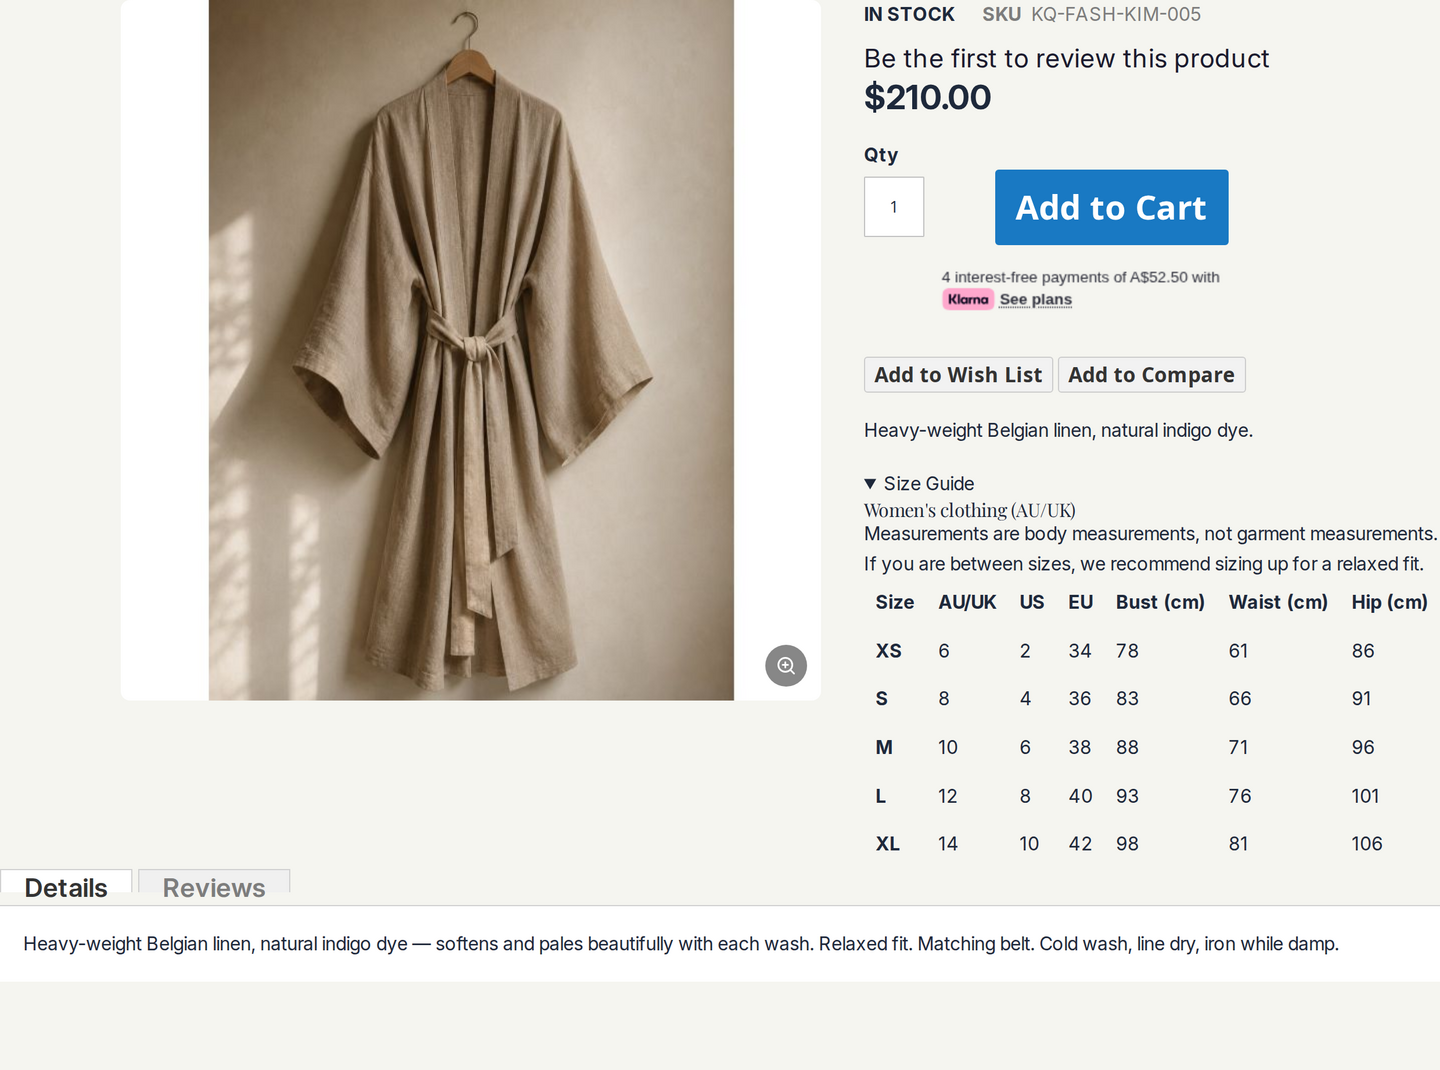
In tab mode it becomes another tab alongside Details and Reviews.
Where a guide carries both units, a small cm / in toggle switches the columns. With JavaScript unavailable, the toggle simply is not interactive and all columns render — the chart is never hidden behind script.
Placing a guide anywhere (Pro)
Besides the two product-page positions, Size Guide ships a standard Magento widget, so a chart can be placed on any page, in any layout position, on any theme.
Go to Content → Widgets → Add Widget, choose CPS Size Guide as the type and your theme, then Continue.
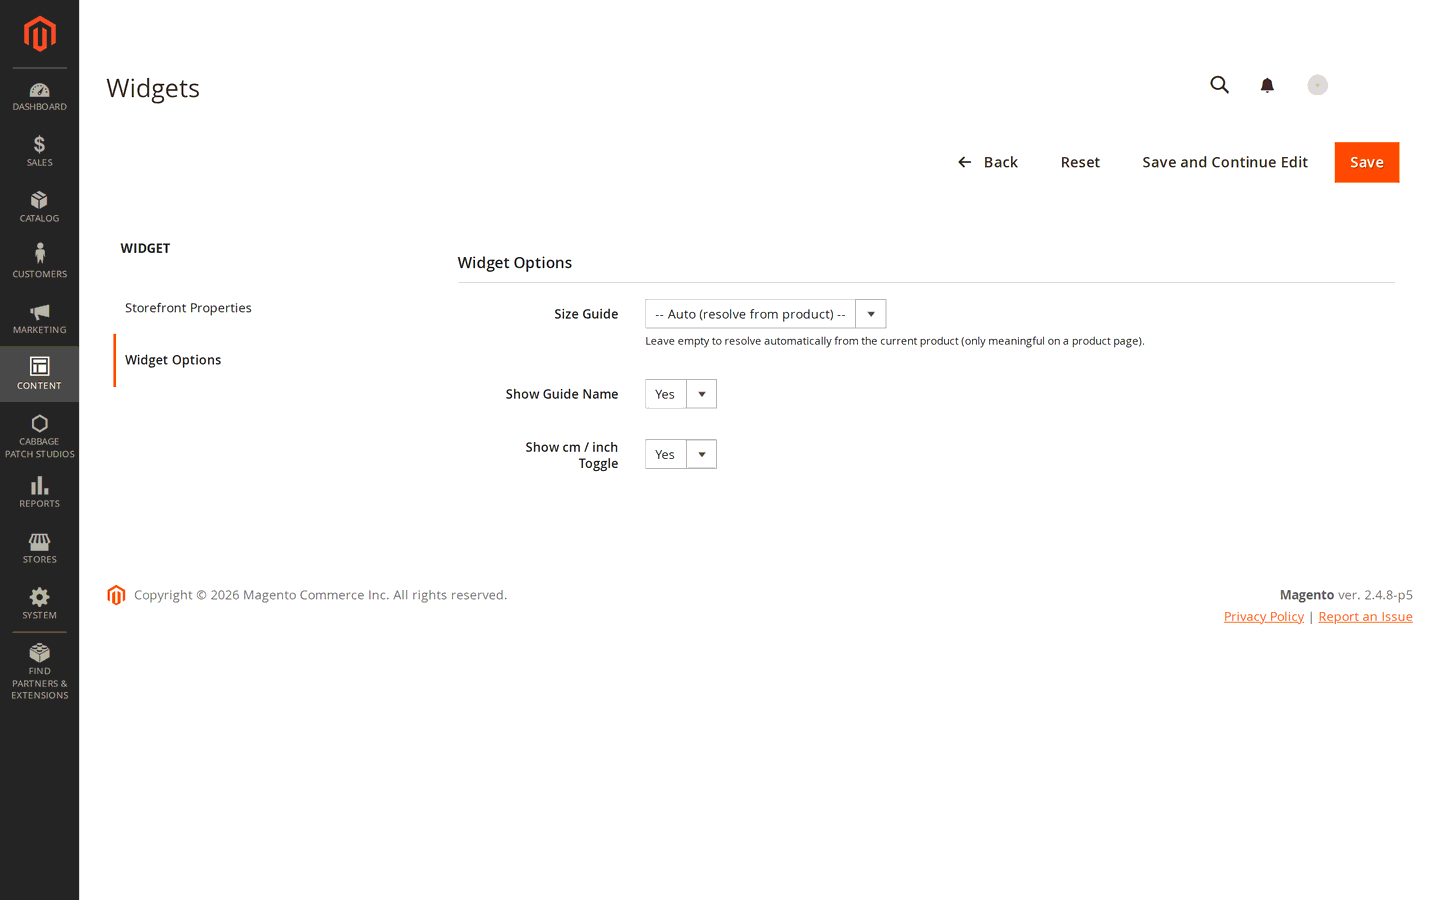
Under Widget Options:
- Size Guide — pick a specific guide, or leave it on Auto to resolve the guide for whatever product the page is showing. Auto is only meaningful on a product page.
- Show Guide Name — whether the guide's name renders above the chart.
- Show cm / inch Toggle — whether the unit toggle appears in this placement.
Then set the pages and layout position under Layout Updates, as with any Magento widget. A common use is a single "Size & fit" page in the footer carrying every chart you publish.
Notes and limits
- The free tier is capped at two guides. Saving a third is refused with a message telling you why. Existing guides keep working — the cap is on creating new ones.
- Pro fields are absent, not disabled, on the free tier. Category, attribute-set and store scoping are refused when the form is saved as well as hidden, so an upgrade later cannot silently activate assignments that were never really allowed.
- Image-based guides are not in version 1. Charts are tables. If you need a diagram, place it on the page around the guide.
- Six ready-made standards ship in version 1 — not an unlimited library.
- Accessibility: the panel uses native HTML semantics and is keyboard operable and screen -reader announced. The module has not been formally audited against WCAG, and we do not claim conformance.
Changelog
This guide is itself a Lurox page. Every revision is a published version in Lurox's built-in content history, so we can roll any guide back to an earlier version at any time. The public changelog below tracks what changed and when.
15 August 2026
- Initial publication: enabling the module and setting display mode and labels per store view, entering the free or Pro licence key, building a size chart with columns and rows, starting from a ready-made standard, assigning a guide to products, categories and attribute sets and how the module decides which guide wins, per-store visibility, what the shopper sees in panel and tab mode, and placing a chart anywhere with the widget.
Explore the rest of the library
Browse every Cabbage Patch Studios user guide in one place.
All User Guides