

Product Attachments User Guide
Datasheets, manuals and warranties on the product page — stored once, assigned anywhere, and downloaded only by the people you allow.
What the Product Attachments module does
Product Attachments puts downloadable documents where your buyers are already looking — the datasheets, manuals, warranties, size charts and certificates that answer the questions a product description cannot. Files can be attached to products, and on Pro also to categories and CMS pages.
It is built around a file library rather than per-product uploads. A file is stored once and then assigned wherever it belongs, so one installation manual can serve forty products, a category and a support page at the same time. Replace the file and every place it appears updates together — there are no duplicate copies to hunt down later.
It is freemium. The Free tier is the whole attach-to-product workflow: file-type icons, file sizes, a product tab or a content block, a secure controller-served download, and the admin file grid. Pro ($299, per website) adds category and CMS attachments, file reuse, customer-group and store-view scoping, the secure-download suite, download analytics, documents in the customer account, order-email attachments, file groups, web links, CSV import/export, the standalone widget, and REST + GraphQL.
Getting started
Enable the module
Go to Stores → Configuration → Cabbage Patch Studios → Content: Product Attachments and set Enable Product Attachments to Yes. The remaining groups only apply once it is enabled:
- Display Settings — the Tab Label shown on the product page, whether to Show File Size and Show File Type Icon, and the Display Mode: Product Tab or Content Block.
- Upload Settings — Allowed File Extensions and Maximum File Size (MB).
- Order Email Attachments (Pro) — whether to attach files to order emails, which order statuses trigger it, and a maximum total attachment size.
pdf, doc, docx, xls, xlsx, zip, png, jpg and the maximum file size is
10 MB. Both are plain configuration fields — add the types your catalogue needs and
raise the limit if your manuals are large.Where it lives in the admin
The working screens are under Content in the Cabbage Patch Studios menu:
- Content → Product Attachments — the file library.
- Content → Attachment Groups (Pro) — named sections for organising documents.
- Content → Attachment Downloads (Pro) — the usage report.
- Content → Attachment Import / Export (Pro) — bulk CSV transfer.
Entering your licence key
Both tiers come with a key. Your Free key arrives with the $0 download — emailed to you and listed under My Licenses in your account, exactly like a paid one. Enter either key at Stores → Configuration → Cabbage Patch Studios → Licensing → CPS Product Attachments License, then click Revalidate.
The Pro key is the one that unlocks the Pro capabilities marked throughout this guide.
The file library
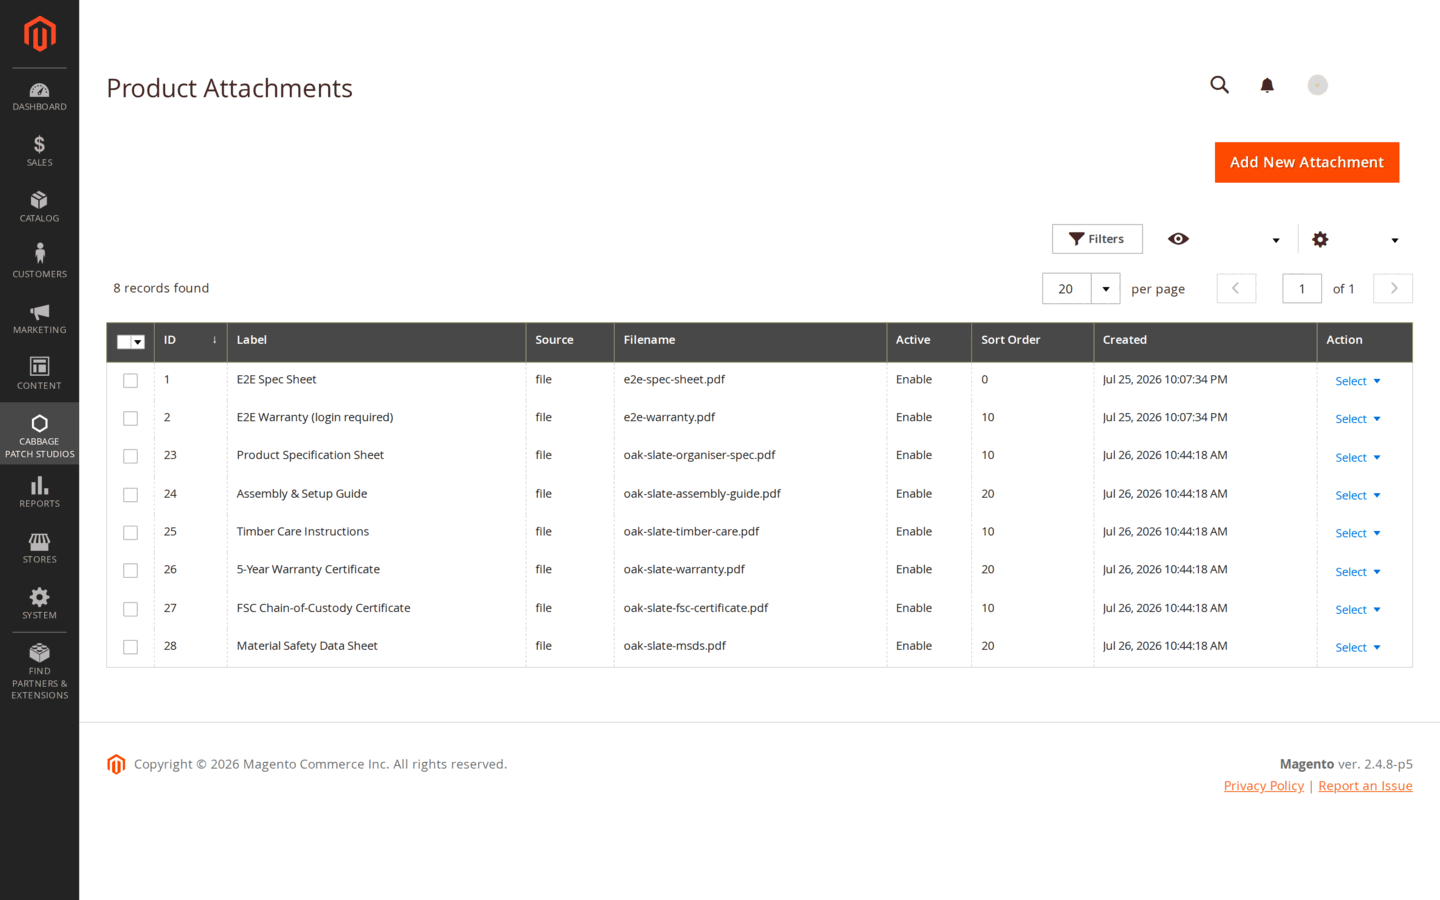
Everything starts at Content → Product Attachments. The grid lists every stored file with its label, type, size, group and status.
Adding a file
- Click Add New Attachment.
- Enter the Label — this is what customers see, so write “Installation manual (EN)”, not “manual-v3-final.pdf”.
- Choose the Source: upload a file, or (Pro) point at a URL for a document hosted elsewhere.
- Set a Sort Order to control where it appears in the list, and leave Active set to Yes.
- Add one or more Assignments — the products, categories or CMS pages this file belongs to.
- Save.
Controlling who can download, and for how long (Pro)
The same form that holds a file’s label and assignments also carries its access rules. They are enforced in the download controller against the download log — not by hiding a link — so a URL that was saved or shared still has to satisfy every rule at the moment it is used.
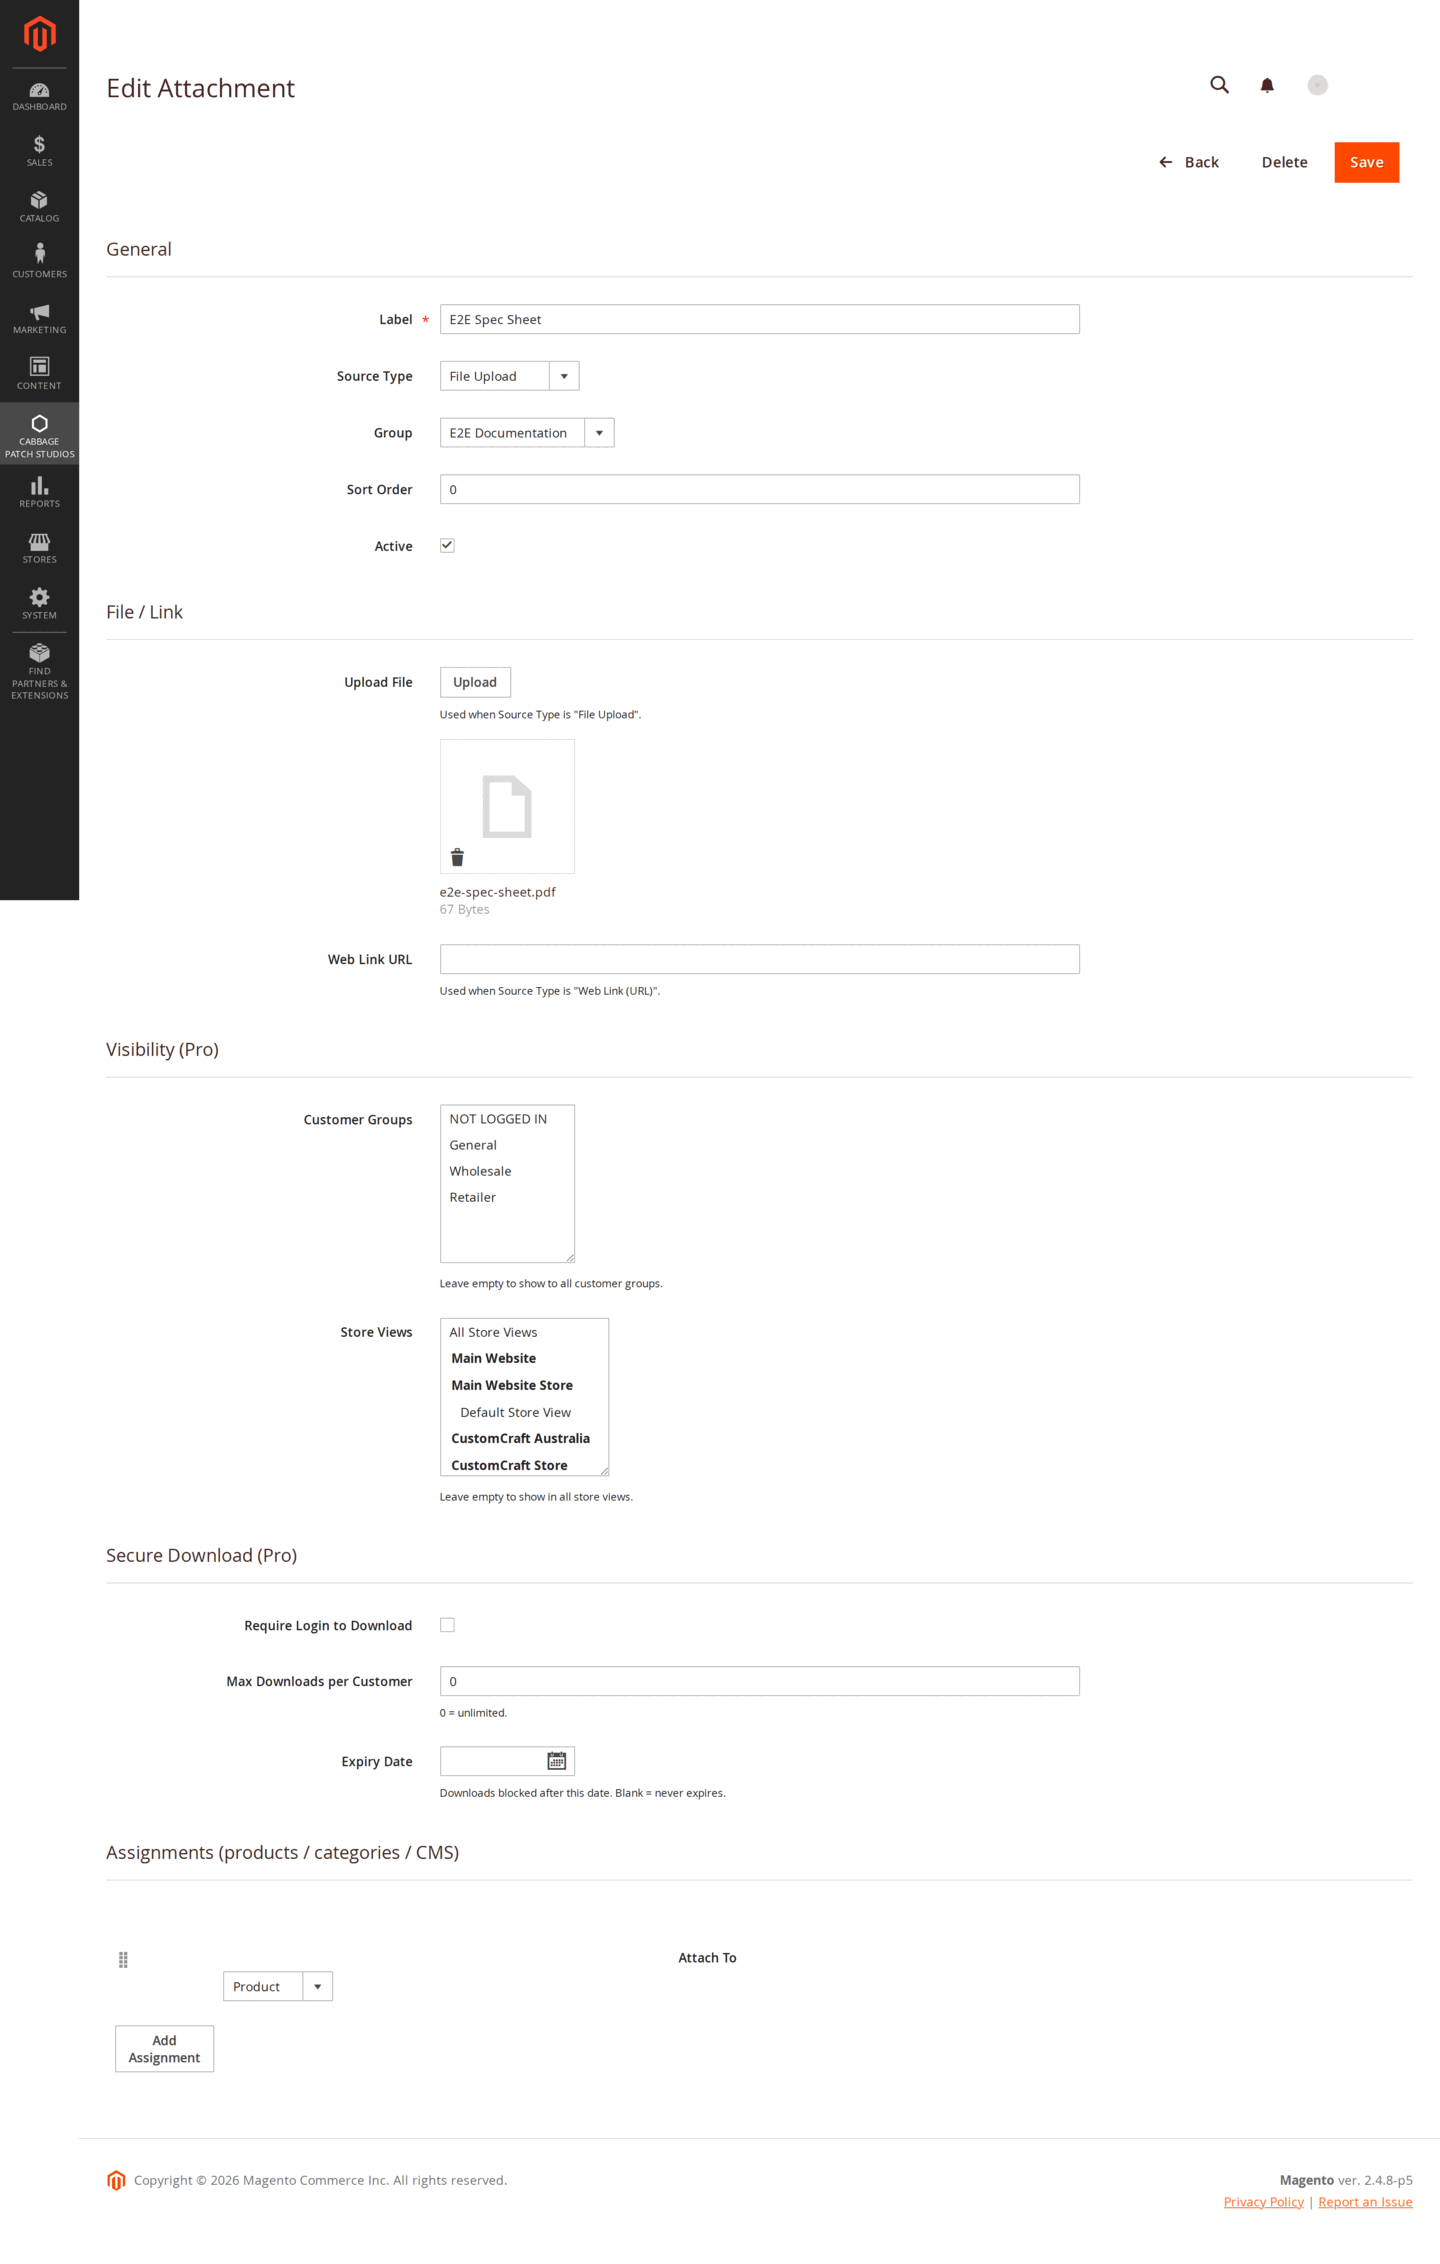
- Customer Groups — leave empty for everyone, or select the groups allowed to see and download the file.
- Store Views — leave empty for all, or restrict the file to particular store views.
- Requires Login — guests are sent to sign in rather than served the file.
- Max Downloads — the number of times a single customer may download it. 0 means unlimited.
- Expires At — the date after which the file is no longer served.
Attaching from the product page
You do not have to work from the library. Open any product in Catalog → Products and you will find a Product Attachments section on the product form listing what is already attached and letting you attach more.
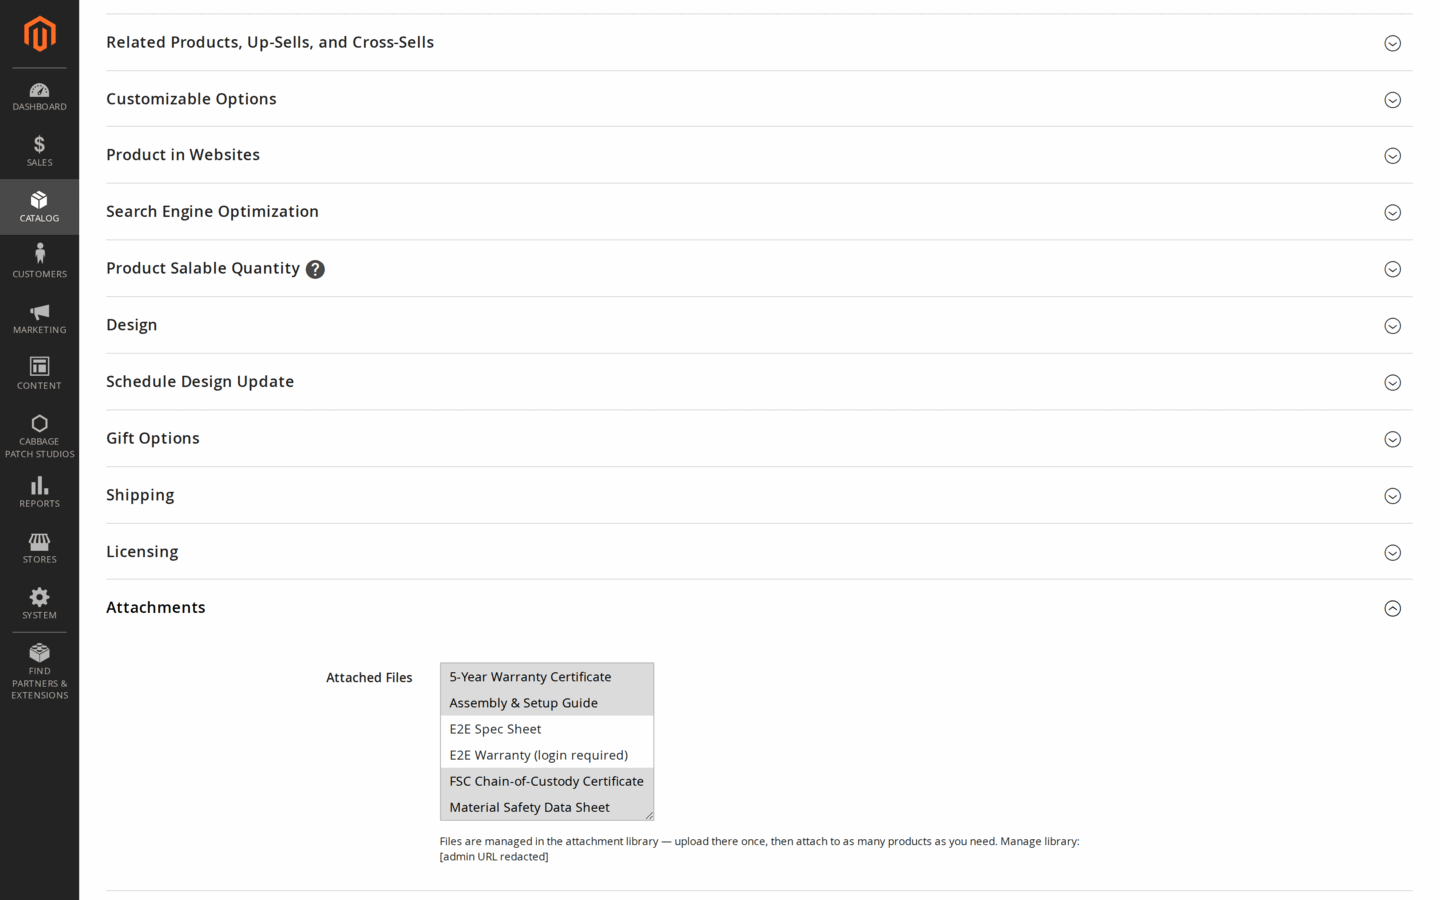
This is usually the faster path when you are setting up a single new SKU; the library is the faster path when one document has to reach many products at once.
What customers see
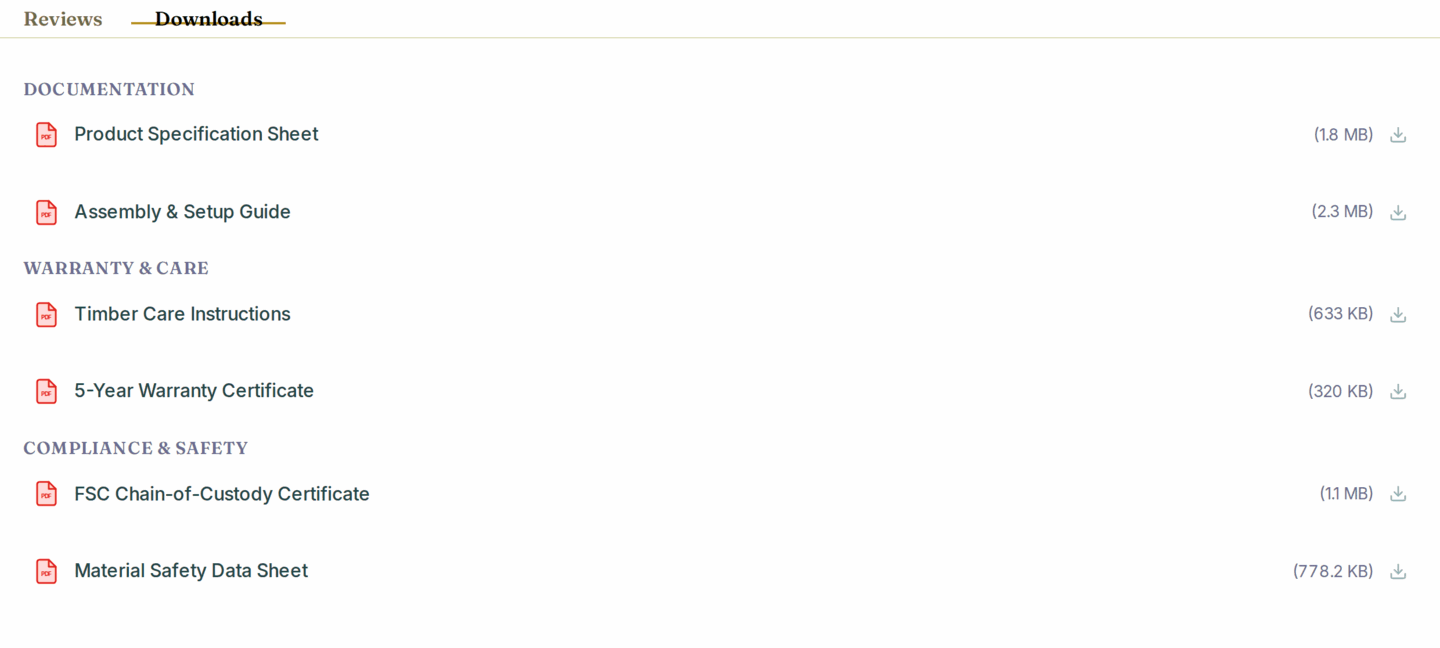
On the storefront the attached documents appear on the product page as a tab or a content block, depending on your Display Mode setting. Each row shows the file-type icon, the label you gave it and the file size, so a customer knows what they are about to open.
Organising documents into groups (Pro)
Once a product carries more than a handful of files, a flat list stops helping. Groups let you sort documents into named sections — Manuals, Certificates, Safety — each with its own sort order and icon.
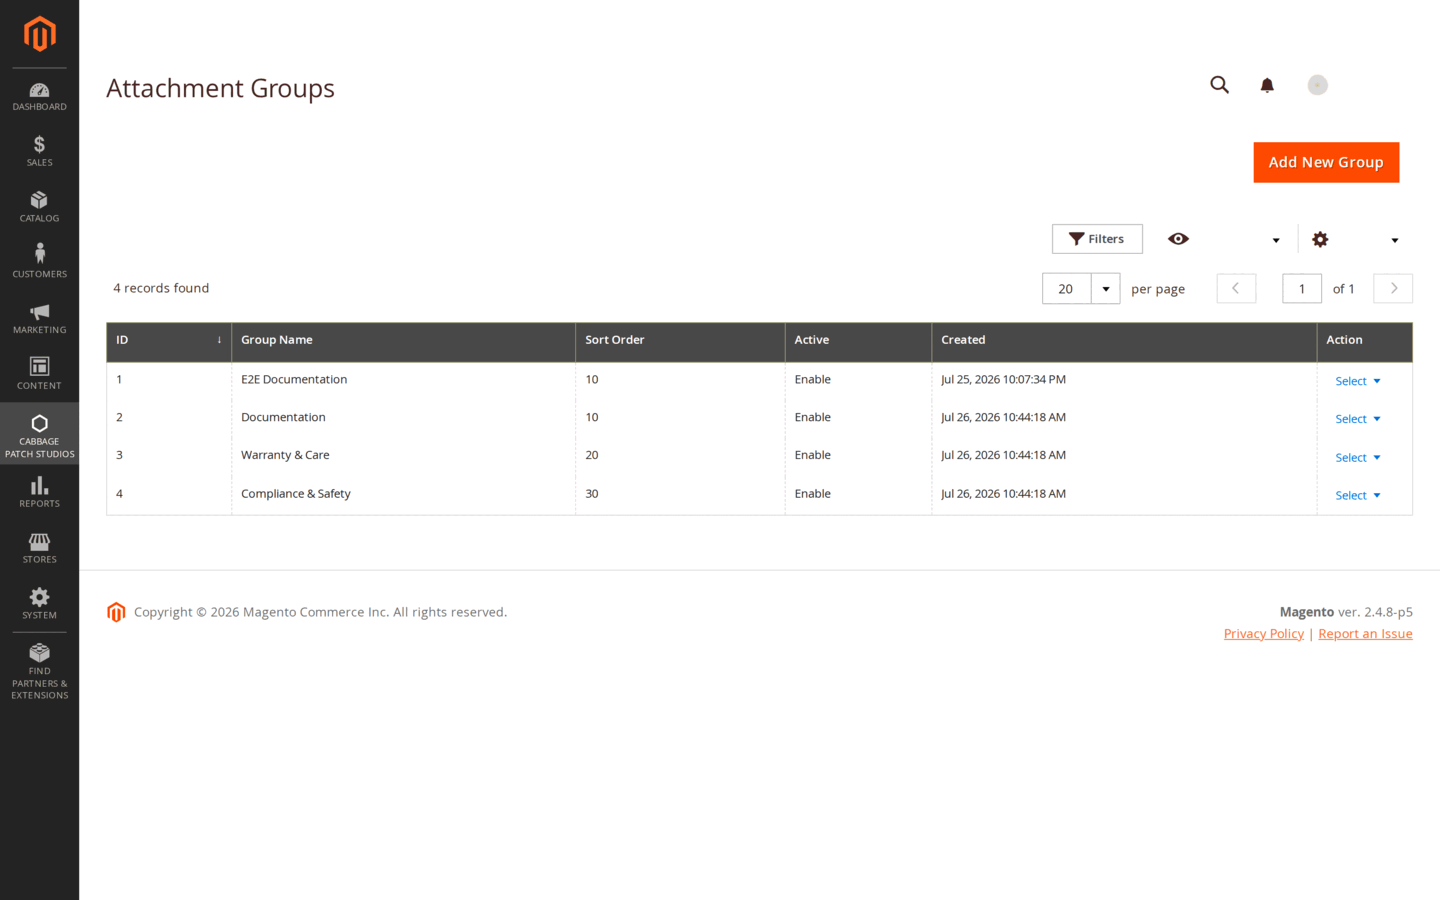
- Go to Content → Attachment Groups and click Add New Group.
- Give it a Name, a Sort Order, and optionally a custom Icon.
- Open a file in the library and set its Group.
Grouped files are shown under their section heading wherever the list is rendered.
Seeing what gets downloaded (Pro)
Content → Attachment Downloads records every download: which file, which customer, the page it was requested from, and when.
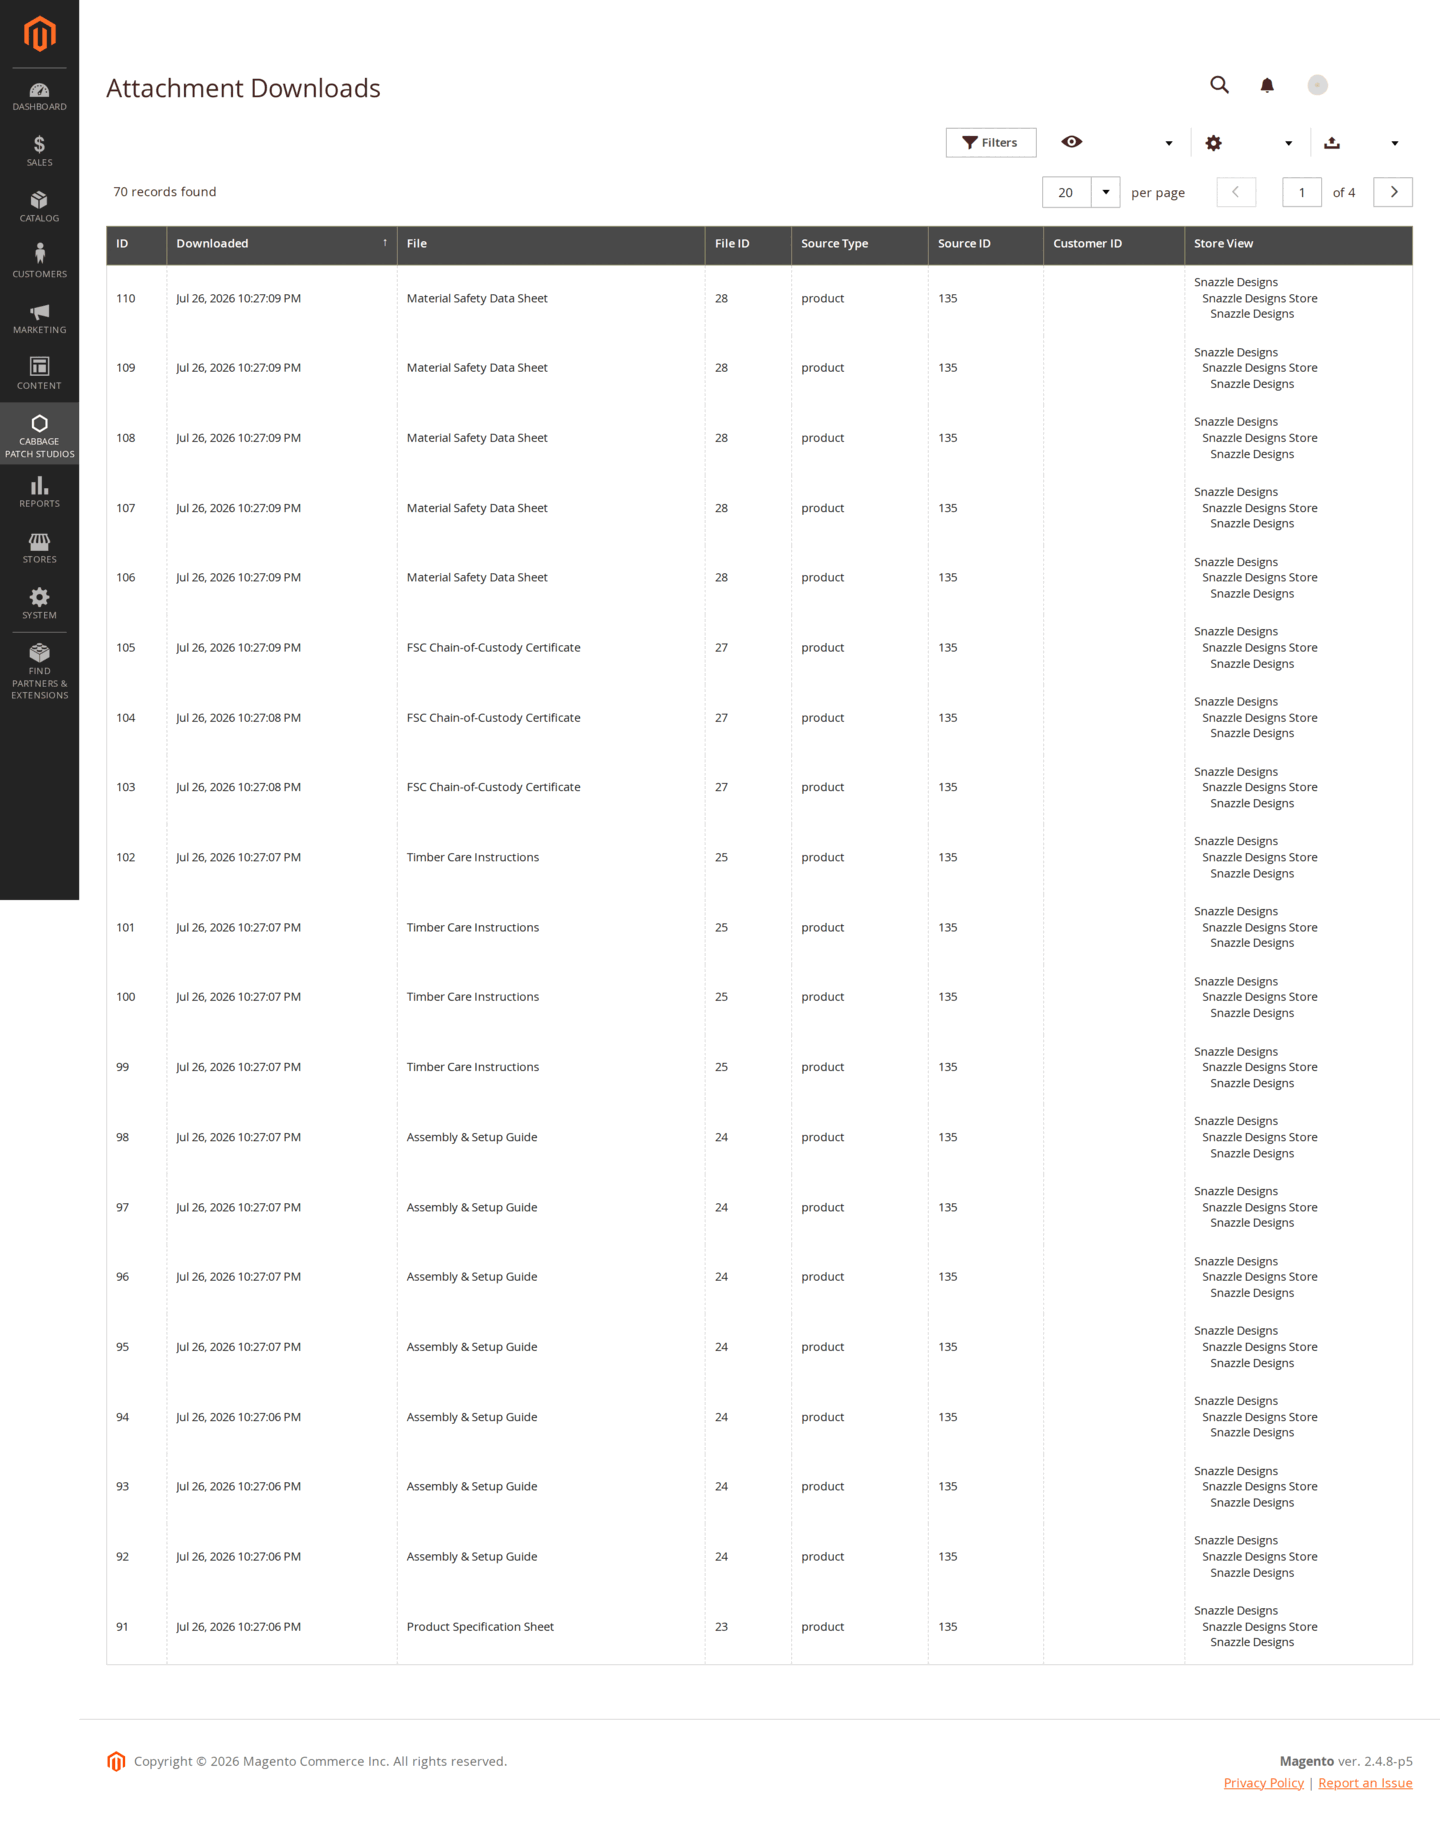
The report is also the enforcement record — per-customer download limits are counted against this same log, so what you see and what the rules act on can never drift apart.
Bulk import and export (Pro)
A catalogue with a document per SKU is not a job for a form. Content → Attachment Import / Export moves attachments and their assignments in and out as CSV.
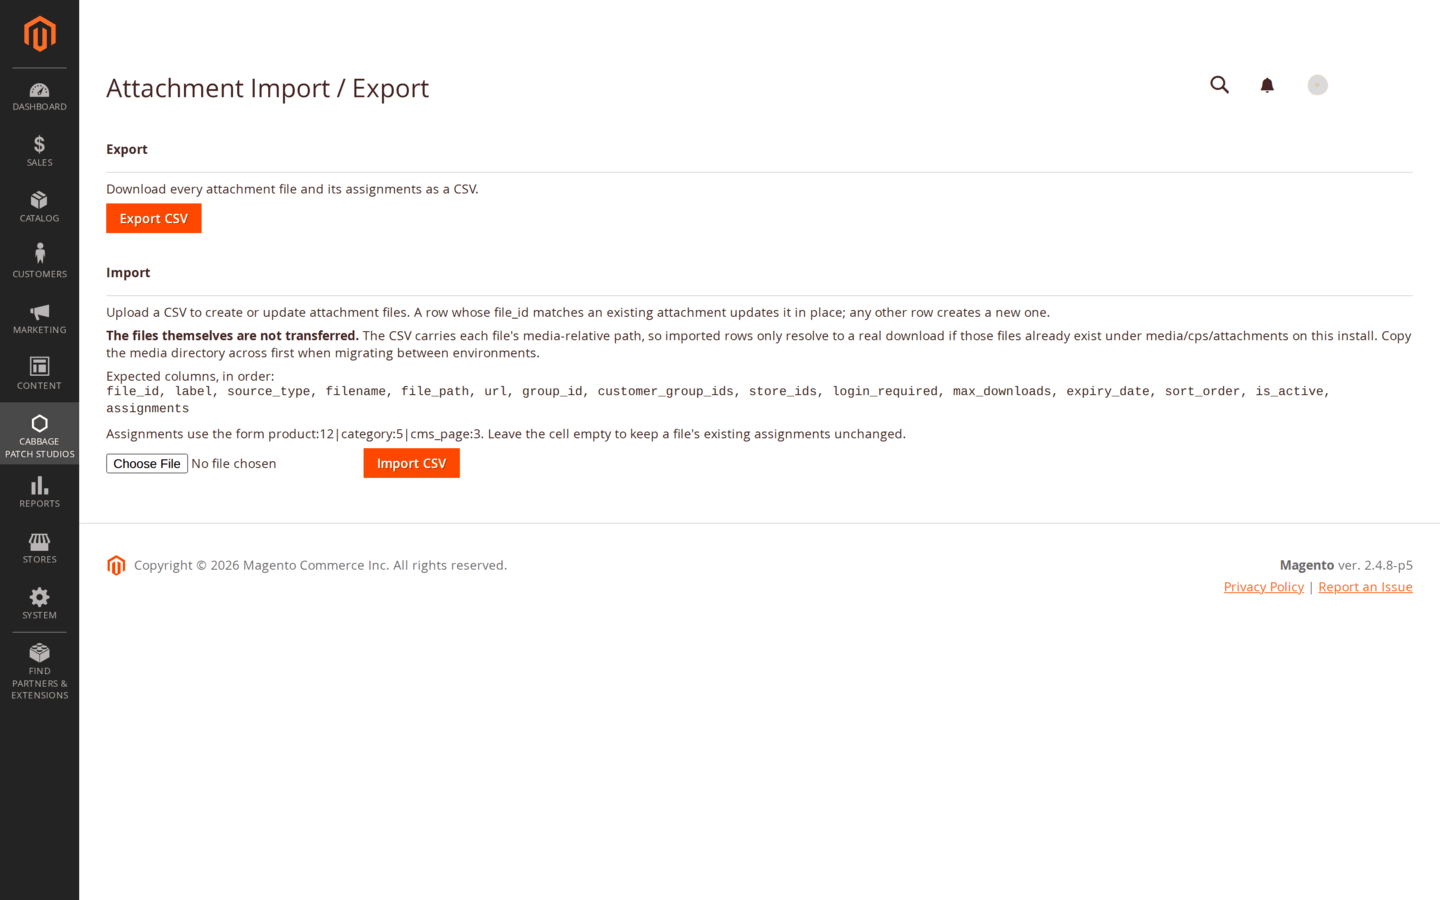
- Export writes the current attachments and assignments to CSV — useful for a bulk edit in a spreadsheet, or for moving a document set between staging and production.
- Import reads that same shape back in, creating new records and updating existing ones.
Notes & compatibility
Themes. The storefront output is static-first HTML, so it renders on Luma, Hyvä and Lurox (and any other modern theme) without a theme-specific build. Interactive niceties layer on with Alpine where a theme provides it; with JavaScript disabled the list still renders in full.
Placement anywhere. Beyond the product page, the Pro widget drops an attachment list into any layout position or CMS block — so a buying-guide page can carry the same documents as the products it discusses.
Integrations. Pro exposes both REST and GraphQL endpoints, so attachments can be read and managed from a PIM, a headless storefront or a deployment script.
Storage. Files live in your own Magento media directory. There is no cloud storage and no third-party document service — nothing leaves your infrastructure.
Changelog
This guide is itself a Lurox page. Every revision is a published version in Lurox's built-in content history, so we can roll any guide back to an earlier version at any time. The public changelog below tracks what changed and when.
28 July 2026
- Initial publication: enabling and configuring display, upload and order-email options, entering the Pro licence key at website scope, building the file library and assigning documents to products, categories and CMS pages, controlling downloads with customer-group and store-view scoping plus limits and expiry dates, attaching from the product edit page, organising documents into groups, reading the downloads report, and bulk CSV import/export.
Explore the rest of the library
Browse every Cabbage Patch Studios user guide in one place.
All User Guides